Getting Started
To begin, simply click the Create button on the home page or visit wishflo.com/create directly. This will take you to the creation page where you can set up your Wishflo page by following these steps:
- Selecting a Template
- Entering details of the celebration
- Designing the Page
- Inviting contributors and settings
- Publishing the Page
Each of these steps is explained in more detail below.
Selecting template
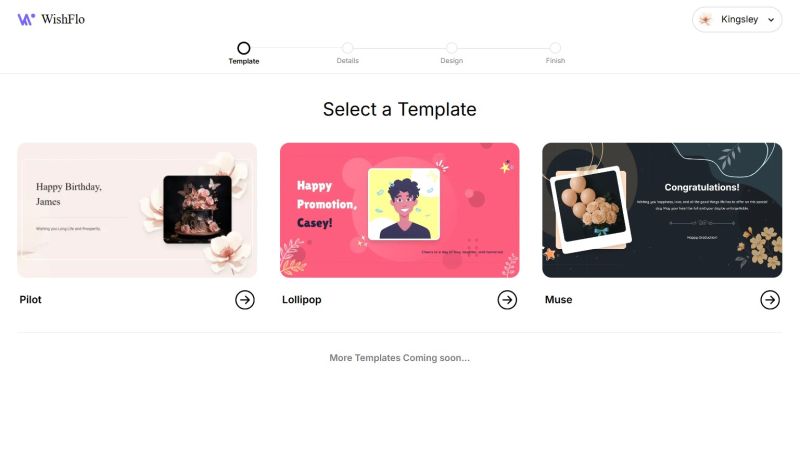
The first step in creating your WishFlo page is selecting a template. You'll be presented with a range of beautifully designed templates, each tailored to different types of celebrations.
To get started:
- Browse through the available templates and click on any to preview how it will look.
- Once you’ve found the perfect one, click Begin to move forward.
If you aren’t logged in yet, don’t worry — clicking Begin will prompt you to either log in or quickly create a new account. This process only takes a few seconds, and then you'll be ready to continue setting up your page!
Celebration details
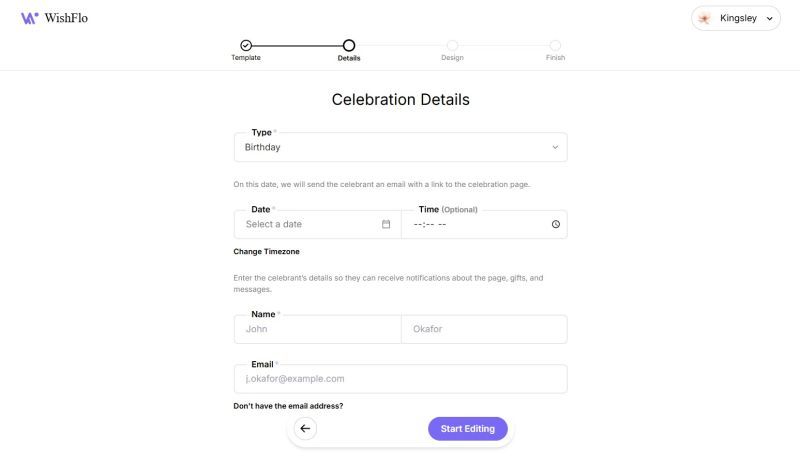
Once you’ve selected a template, the next step is to enter the celebration details. These details personalize your Wishflo page and ensure it’s set up correctly for the celebrant. Here’s what you’ll need to provide:
- Celebration Type: Select the type of event you’re creating the page for, such as a Birthday, Anniversary, Wedding, Farewell, or others.
- Celebration Date: Choose the date of the event. This is the day the celebrant (the person for whom the page is being created) will be notified about the page. If you include an optional time, the notification will be sent at that specific time as well.
- Timezone: Select the timezone for the event. By dy default, this is set to your timezone, but if the celebrant is in a different timezone, change it to theirs.
- Celebrant Name: Enter the first and last name of the celebrant so they know the page is dedicated to them.
- Celebrant Email: Provide the celebrant’s email address. This is where the notification about the WishFlo page, as well as any other event-related communication, will be sent.
Tip: If you don’t have the celebrant’s email and don’t want to ruin the surprise by asking, you can use a trusted alternative (such as your own secondary email or a family member’s). Keep in mind: all updates and notifications will go to that email, and the page will appear in that email’s dashboard. Be sure to share the page link with the celebrant on the day of the event.
When done, click Start Editing to proceed to the next step: Designing the Page.
Design page
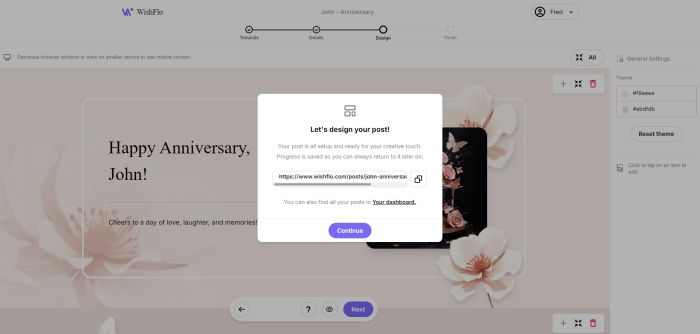
Now that you’ve added the celebration details, it’s time to design your WishFlo page!
When you reach this step, a pop-up will show a link to the page you’re working on. You can visit this link anytime to continue designing. You’ll also find the page in your dashboard.
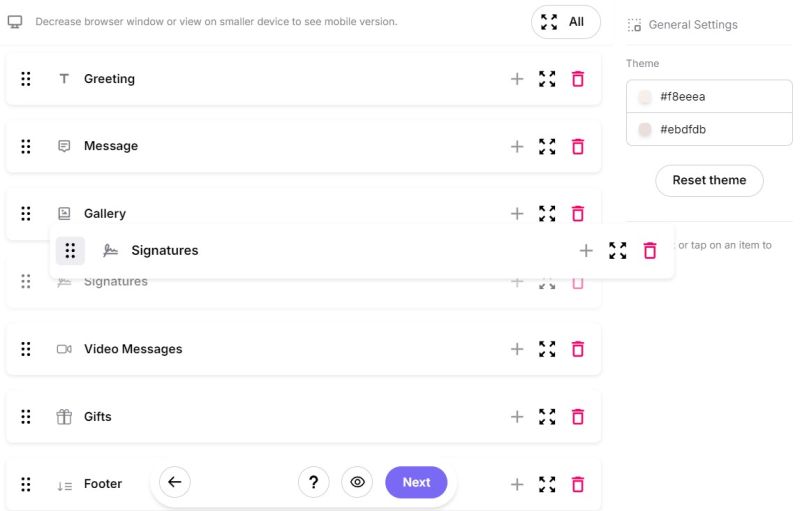
A WishFlo page can have 1 to 7 sections. By default, each new page starts with 4 sections: Greeting, Image Gallery, Wishes, and Gifts, and remaining 3 sections: Message, Video Messages, and Footer can be added by clicking the + section button.
- Greeting: The first section, usually containing the main message. This is what the celebrant sees first (unless you change the order).
- Message: A brief message or note, often used to share a well-wish or acknowledgment of the celebrant.
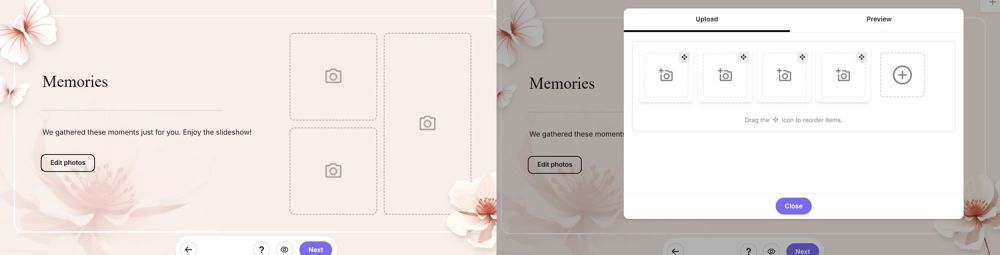
- Gallery: This section lets you upload images that the celebrant can view in a slideshow. After publishing, the images will be displayed beautifully.
- Footer: This is usually the last section of the page, where you can add a final greeting or closing message.
You also have three "contributable" sections, where friends, family, and other invitees can contribute content. These sections are:
- Signatures: A message board for friends, family, and others to post well wishes. Learn more about signing a page here.
- Video Messages: Invitees can upload video greetings. On the celebration date, the celebrant can watch a video slideshow of all the messages. Learn more about video uploads here.
- Gifts: Invitees can upload gifts or send items from the WishFlo Gift shop. Learn more about leaving a gift here.
Editing Sections
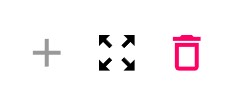
During the editing process, you can add, remove, or reorder sections. To add or delete a section, click the plus or delete icons on the widget above the section.
Note:
- Every WishFlo page must have at least one section.
- Removing contributable sections (Gifts, Wishes, or Video Messages) means invitees won’t be able to contribute that content.
To reorder sections, collapse them by clicking the four arrows icon, then drag the six dots icon to move the section. To expand the section again, click the same four arrows icon. You can also collapse or expand all sections by clicking the four arrows icon at the bottom menu.
Editing Content and Theme
You can edit the texts, images, themes, and font styles on the page. However, the contribution widgets (Gift upload, Message board, and Video upload) cannot be changed.
Editing Text
To edit any text, simply click on it. This will highlight the text, allowing you to type in new content. You can also remove the text by clicking the Bin Icon.
Editing Font Styles
The sidebar provides controls for the appearance of each text type — Headings, Subheadings, Paragraphs, and sometimes an Accent font depending on the template. You can adjust the font type, size, color, and apply bold, italic, or underline. Simply update these values in the sidebar.
On mobile, tap the brush icon in the bottom menu to open the sidebar and adjust styles. When finished, press the Back button to return.

Editing Images
To edit an image, click the Edit button on the top left corner of any image, then upload your new image.
Editing Theme
You can customize the theme colors of your WishFlo page. The top section of the sidebar color pickers to change the theme. To reset to the template’s default colors, click the Reset Theme button.
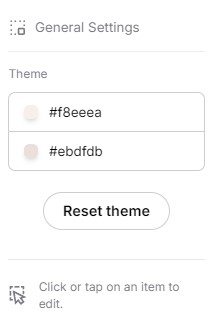
Note: All changes are saved automatically
Previewing Your Changes
To preview your work before proceeding, click the Eye icon at the bottom toolbar, next to the Next, Help, and Back buttons.

Next Steps
When you’re happy with your page, click Next to proceed. Don’t worry—you can always come back and make changes as long as the page isn’t published.
Finishing up
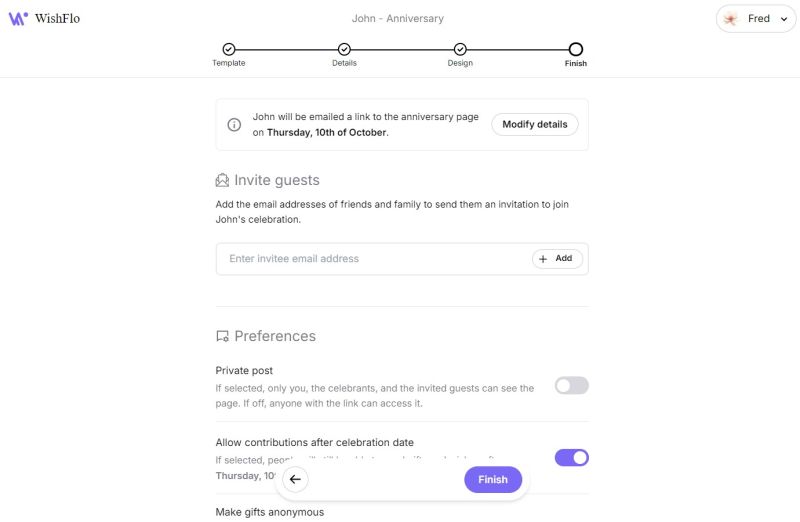
Once you’ve designed your page, the final steps involve adding invitees (optional) and confirming your page settings.
Adding Invitees
To invite people to view or contribute to the page, simply enter their email addresses and click the Add button. These invitees will receive a special email with a link to your page after it’s published, where they can view and contribute to the celebration.
Setting Your Preferences
Before publishing, you’ll also have the option to adjust some important preferences for the page:
-
Private Post: If this is enabled, only invitees will be able to view and contribute to the page. They will need to log in or sign up using the email address you invited. If disabled, anyone with the link will be able to access the page.
-
Allow Contributions After the Celebration Date: Turning this on allows contributors to continue sending gifts, wishes, and videos even after the celebration date has passed. The celebrant will receive an email notification for any new contributions.
-
Gift Anonymity: Choose whether gift senders are anonymous, non-anonymous, or if contributors can decide for themselves. If set to "user-selected," each contributor can choose whether or not to remain anonymous.
Final Review
After adding invitees and setting your preferences, take a moment to review the page’s details, design, and settings. If everything looks good, you’re ready to publish!
Note: Once your page is published, no further edits can be made. If you find an issue before the celebration date (or after, as long as no contributions have been made), we recommend terminating the post and starting a new one.
Next steps
Congratulations! You’ve successfully created your WishFlo page.
- Celebrant Notification: The celebrant will automatically receive a notification about their page on the celebration date.
- Invitee Notification: If you added invitees, they will be notified immediately and can start viewing and contributing to the page.
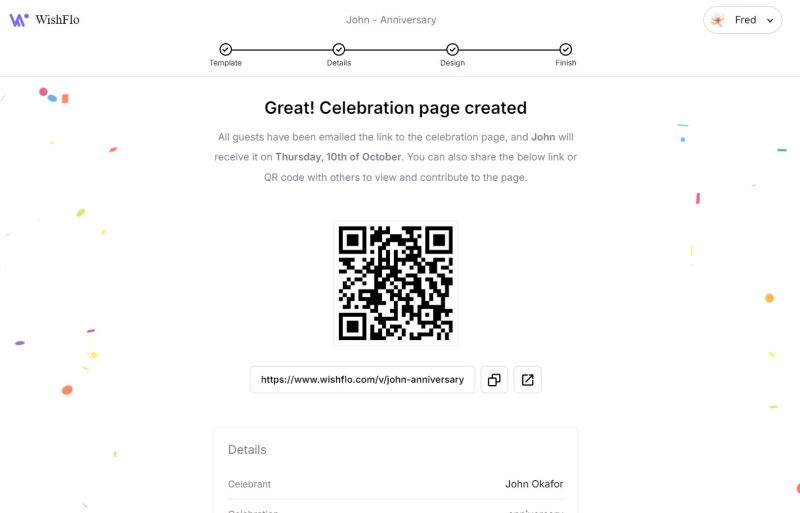
Sharing the Page
On the confirmation screen, you’ll find the link and a QR code to access the page. You can also view the page anytime through your dashboard.
If the page isn’t set to private, feel free to share the link with friends and family who weren’t added as invitees. They’ll be able to view and contribute to the page just like the invited guests.
We hope your celebrant enjoys the thoughtful page you’ve created for them. Good luck, and thank you for using WishFlo!